

Good morning lovelies, how are you today? I'm having a rather chilled out morning before I pop into work this afternoon. I've been getting very excited over planning for my Etsy shop opening recently, and hopefully will have news to share with you soon.
Today I'm going to share with you my easy peasy how-to for getting lovely nails! I'm not claiming to be any kind of expert, but I do love painting my nails! It has to be easy because I'm not very good with anything cosmetics related, so if I can do it then anyone can :) here's what I used...
Cuticle stick Similar // Boots £1.00
4 way nail buffer Similar // Boots £3.50
Jessica Restoration base coat Amazon £8.70 (on offer)
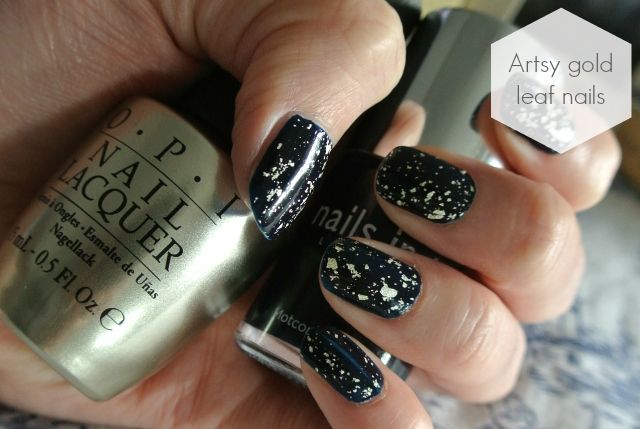
Nails Inc Motcomb Street Nails Inc £11.00
O.P.I. Pure 18K Top Coat ASOS £10.50 (on offer)
Step 1:
Cut your nails as you usually would to your desired shape. I always opt for round nails, they seem less
prone to breaking and I prefer the look. I prefer to use nail clippers.
Step 2:
File your nails down so there are no rough edges, and push back cuticles with your cuticle stick.
Step 3:
Follow the nail buffer from step 1-3. I don't use the shine buffer when putting polish on so as to avoid
making my nails too smooth, and more prone to chipping.
Step 4:
Apply your base coat of choice. I'm currently using this Jessica Restoration one, it seems to strengthen
my nails. However, I find my nail polish doesn't last as long when wearing this. I only use a base coat
when wearing a dark polish to avoid staining.
Step 5:
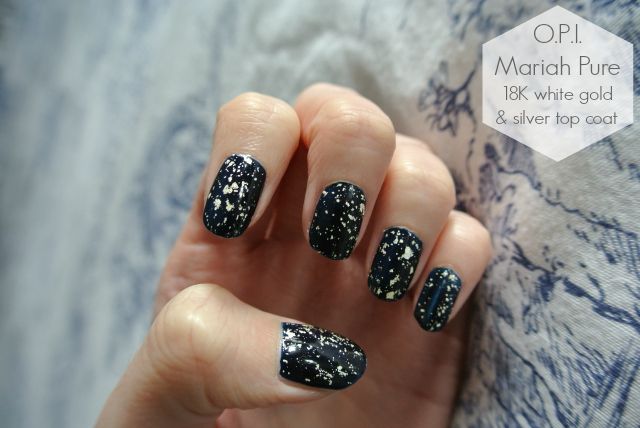
Apply your desired nail colour. I've chosen Motcomb Street to go underneath because I think it makes the
top coat more noticeable. It's my favourite navy shade, and the combination reminds me of a starry sky!
Step 6:
Apply your top coat. This particularly gorgeous gold leaf style top coat from O.P.I. caught my eye when I
was searching for artists gold leaf. When I saw it on sale on ASOS, I snapped it up. I couldn't be happier
with it - it's so pretty and unusual! It has a really lovely shiny finish too.
What do you think? Would you like to try out this top coat or gorgeous shade of navy? I got lots of compliments on this beautiful combination, even Mark approved without prompting!
Did you see who the winner of the Print Kitchen giveaway was?
Facebook // Instagram // Bloglovin' // Pinterest


It does actually look like a starry sky or a really cool abstract painting - lovely! xxx
ReplyDeleteWow that's pretty cool! I should experiment more with nail art. I'm a bit of a picker… I scratch the varnish off as soon as it starts to chip. Very naughty!
ReplyDeleteThis looks lovely though : )
Gemma
Faded Windmills
Love this look! I will have to pin & try later ;) xoxo
ReplyDeletewww.roseandmuse.blogspot.com
www.roseandmuse.blogspot.com
I absolutely love this look! The gold looks so elegant :) xxx
ReplyDeleteOmgosh, this is such a beautiful look! I definitely need that top coat in my life
ReplyDeleteTara x
These look gorgeous! So simple but so effective xxx
ReplyDeleteI actually gasped out loud at how gorgeous these nails are, wow!
ReplyDeleteThe leaf print is oh so pretty and it actually also reminds me of a twinkling galaxy print <3
Sophie | soinspo xo
Wow I'm not one for nail art usually, but these look incredible! Daisy xxx
ReplyDeletehoyden-blog.blogspot.com
This is so pretty, Hannah! I'm definitely so lazy with my nails- I usually just put two coats of color on and that's it...no preparation or anything.I really need to get a nail buffer and top coat. I absolutely love the way this looks. It seems easy enough to do as well. I definitely would love to try it with Navy as well- in fact, I need to find the perfect shade of navy...that color is hard to find!
ReplyDeleteP.S. I can't wait to hear about your etsy shop!! :) xxx